D Figma: Essential Tips and Tricks to Master It
Por Redacción Aguayo
Explore how to master Figma with this guide filled with essential tips and tricks to optimize your workflow in interface and user experience design.
What is Figma?
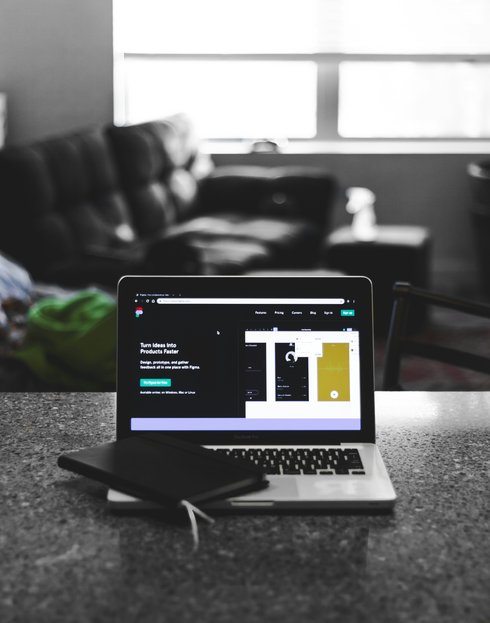
Figma is a web-based design tool that allows designers to create, collaborate, and prototype user interfaces and user experiences quickly and efficiently. Unlike traditional design tools that run locally on a device, Figma operates in the cloud, meaning design files are stored online and accessible from anywhere with an internet connection. This facilitates real-time collaboration among designers and other team members, as everyone can work on the same file simultaneously, without worrying about outdated versions or file conflicts.
Key Features of Figma
One of the most standout features of Figma is its ability to enable real-time collaboration. Users can invite others to view and edit a design file in real-time, making review and quick iteration a breeze. Additionally, Figma offers a variety of powerful design tools, including vector drawing tools, prototyping tools, component design features, and shared libraries. These features make Figma a versatile choice for a wide range of design projects, from creating simple user interfaces to designing complex design systems.
Advantages of Using Figma
One of the main advantages of using Figma is its accessibility and ease of use. Being a web-based application, Figma requires no downloads or installations, meaning users can access their design files from any device with a modern web browser. Additionally, Figma offers an intuitive and familiar interface that is easy to learn for those familiar with other graphic design tools.
Another important advantage of Figma is its ability to facilitate collaboration between distributed teams. With real-time collaboration features and the ability to leave feedback directly on the design, Figma eliminates traditional barriers associated with design collaboration, such as endless emails and tedious review meetings. This allows teams to work more efficiently and agilely, resulting in a faster design process and higher quality of final product.
In short, Figma is a powerful and versatile design tool that has transformed the way teams design and collaborate on digital design projects. With its focus on real-time collaboration, robust feature set, and ease of use, Figma has become a popular choice among designers and design teams around the world. In the next few chapters, we'll explore in detail how to make the most of all of Figma's capabilities and some tips and tricks to improve your design workflow.
Configuración Inicial y Personalización
Al comenzar a utilizar Figma, es crucial realizar una configuración inicial adecuada y personalizar la herramienta según tus preferencias y necesidades. En este capítulo, exploraremos los pasos necesarios para configurar Figma desde cero y cómo personalizar la interfaz para optimizar tu flujo de trabajo de diseño.
Configuración Inicial de Figma
El primer paso al utilizar Figma es crear una cuenta y configurar tu espacio de trabajo. Para ello, simplemente visita el sitio web de Figma y sigue las instrucciones para registrarte. Una vez que hayas creado tu cuenta, tendrás acceso al tablero de Figma, donde podrás crear nuevos proyectos, explorar recursos y acceder a tus archivos existentes.
Después de crear tu cuenta, es importante configurar tu perfil y preferencias de usuario. Puedes hacerlo accediendo a la sección de configuración de tu cuenta, donde podrás agregar información personal, ajustar la configuración de notificaciones y establecer preferencias de privacidad.
Personalización de la Interfaz de Usuario
Una de las ventajas de Figma es su capacidad para personalizar la interfaz de usuario según tus necesidades específicas. Puedes ajustar la disposición de las herramientas y paneles, cambiar los atajos de teclado y personalizar el tema de la aplicación para que se adapte a tu estilo de trabajo.
Para personalizar la interfaz de usuario, dirígete a la sección de configuración de la aplicación. Aquí, encontrarás opciones para ajustar la disposición de los paneles, cambiar el tamaño de las miniaturas y personalizar los atajos de teclado. También puedes seleccionar entre diferentes temas de la aplicación, como el modo claro, oscuro o automático, según tus preferencias de diseño.
Configuración de Preferencias de Diseño
Además de personalizar la interfaz de usuario, también puedes configurar preferencias de diseño para optimizar tu flujo de trabajo. Por ejemplo, puedes ajustar la configuración de rejilla y guías, establecer unidades de medida predeterminadas y activar funciones de asistencia, como la alineación inteligente y el ajuste de formas.
Estas preferencias de diseño te permitirán trabajar de manera más eficiente y consistente, asegurándote de que tus diseños cumplan con las especificaciones y estándares deseados. Explora las opciones de preferencias de diseño en la sección de configuración de la aplicación y ajusta las configuraciones según tus necesidades específicas.
Conclusiones
Configurar Figma de manera adecuada y personalizar la interfaz según tus preferencias puede marcar una gran diferencia en tu experiencia de diseño. Al realizar una configuración inicial completa y ajustar las preferencias de diseño según tus necesidades, podrás optimizar tu flujo de trabajo y aumentar tu productividad al utilizar esta poderosa herramienta de diseño.
Initial Setup and Customization
When starting to use Figma, it's crucial to perform proper initial setup and customize the tool according to your preferences and needs. In this chapter, we will explore the necessary steps to set up Figma from scratch and how to customize the interface to optimize your design workflow.
Initial Setup of Figma
The first step in using Figma is to create an account and set up your workspace. To do this, simply visit the Figma website and follow the instructions to sign up. Once you've created your account, you'll have access to the Figma dashboard, where you can create new projects, explore resources, and access your existing files.
After creating your account, it's important to set up your profile and user preferences. You can do this by accessing the account settings section, where you can add personal information, adjust notification settings, and set privacy preferences.
Customizing the User Interface
One of the advantages of Figma is its ability to customize the user interface according to your specific needs. You can adjust the layout of tools and panels, change keyboard shortcuts, and customize the application theme to suit your working style.
To customize the user interface, head to the application settings section. Here, you'll find options to adjust the layout of panels, change thumbnail sizes, and customize keyboard shortcuts. You can also select from different application themes, such as light mode, dark mode, or automatic mode, according to your design preferences.
Setting Design Preferences
In addition to customizing the user interface, you can also set design preferences to optimize your workflow. For example, you can adjust grid and guide settings, set default measurement units, and enable assistance features such as smart alignment and shape fitting.
These design preferences will allow you to work more efficiently and consistently, ensuring that your designs meet desired specifications and standards. Explore the design preference options in the application settings section and adjust settings according to your specific needs.
Setting up Figma properly and customizing the interface to your preferences can make a big difference in your design experience. By performing comprehensive initial setup and adjusting design preferences to your needs, you can optimize your workflow and increase productivity when using this powerful design tool.
File and Folder Organization
File and folder organization is essential to maintain an efficient and tidy workflow in any design project. In this chapter, we will explore the importance of good file and folder organization in Figma, as well as some best practices to keep your projects organized and easy to navigate.
Importance of File and Folder Organization
Proper organization of files and folders in Figma is crucial for several reasons. Firstly, it helps maintain consistency and clarity in your projects, making it easier to collaborate with other team members and review designs. Additionally, good organization allows you to quickly find the files and resources you need, saving time and reducing frustration.
Folder Structure
When starting a new project in Figma, it's important to establish a clear and consistent folder structure to organize your files. A common practice is to divide folders into main categories such as "Designs," "Components," "Resources," and "Prototypes." Within each category, you can create additional subfolders to further organize your files.
File Naming
In addition to a well-defined folder structure, it's important to use consistent and descriptive file naming. This makes it easier to quickly identify files and helps avoid confusion. When naming your files, make sure to include relevant information such as the project name, date, and a brief description of the content.
Labeling and Organizing Components
In larger or more complex projects, it can be helpful to label and organize components effectively. Figma allows you to label components with relevant keywords and organize them into shared libraries for easy access and reuse throughout the project.
Regular Maintenance and Updates
File and folder organization in Figma is not a static process; it requires regular maintenance and updates as the project progresses. As you add new files and resources to the project, take the time to place them in the appropriate folders and ensure that the folder structure remains logical and consistent.
In summary, file and folder organization is crucial to maintain an efficient and tidy workflow in Figma. By establishing a clear folder structure, using consistent file naming, and labeling and organizing components effectively, you can optimize your workflow and increase productivity in your design projects.
Efficient Use of Tools and Keyboard Shortcuts
In this chapter, we'll explore how to efficiently use tools and keyboard shortcuts in Figma to streamline your workflow and increase productivity in user interface design. From basic drawing tools to advanced editing functions, mastering these resources will allow you to work faster and more efficiently on your projects.
Importance of Keyboard Shortcuts in Figma
Keyboard shortcuts are an invaluable tool for designers as they allow you to perform common actions quickly and efficiently, without relying solely on the mouse or trackpad. In Figma, keyboard shortcuts allow you to quickly access specific functions and tools, helping you streamline your workflow and perform tasks more quickly.
Basic Keyboard Shortcuts
Figma offers a wide variety of keyboard shortcuts that range from basic actions, such as selecting drawing tools and moving objects, to more advanced functions, such as grouping elements and applying styles. Some useful keyboard shortcuts include:
- V: Selects the selection tool (Selection Tool).
- F: Activates the find tool (Find Tool).
- R: Selects the rectangle tool (Rectangle Tool).
- G: Selects the slice tool (Slice Tool).
- Cmd/Ctrl + C: Copies the selected object.
- Cmd/Ctrl + V: Pastes the copied object.
- Cmd/Ctrl + D: Duplicates the selected object.
- Cmd/Ctrl + G: Groups the selected objects.
- Cmd/Ctrl + Shift + G: Ungroups the grouped objects.
Mastering these basic shortcuts will help you perform common tasks more quickly and efficiently in Figma.
Advanced Keyboard Shortcuts
In addition to basic keyboard shortcuts, Figma also offers a series of more advanced shortcuts that can further streamline your workflow. Some examples include:
- Shift + A: Shows or hides all elements of the user interface, allowing you to have a cleaner view of your canvas while working.
- Cmd/Ctrl + Shift + C: Copies the styles of one object and applies them to another.
- Cmd/Ctrl + Alt + V: Pastes the copied styles onto a selected object.
- Cmd/Ctrl + Alt + B: Copies the border styles of one object and applies them to another.
These advanced keyboard shortcuts allow you to perform more complex and specific tasks more quickly and accurately.
Customizing Keyboard Shortcuts
Figma also allows you to customize keyboard shortcuts according to your preferences and specific needs. You can access the keyboard shortcuts settings from the "Preferences" menu in Figma and assign your own shortcuts for specific functions and tools.
In summary, efficient use of tools and keyboard shortcuts in Figma is essential for increasing productivity and streamlining workflow in user interface design. Mastering both basic and advanced keyboard shortcuts will allow you to perform tasks more quickly and accurately, helping you work more efficiently on your design projects.
Collaborative Work in Figma
Figma is a powerful platform that not only allows designers to create stunning user interfaces but also facilitates collaborative work on design projects. In this chapter, we will explore the various features and tools that make collaboration in Figma effective and productive.
Benefits of Collaborative Work
Collaborative work in Figma offers a number of benefits that can significantly improve the design process and the quality of the final product. Some of these benefits include:
- Greater Efficiency: Real-time collaboration enables teams to work together more efficiently, eliminating the need to send files back and forth and wait for others to complete their part of the work.
- Smooth Communication: Figma offers built-in commenting tools that allow team members to discuss and review the design directly on the platform, facilitating smoother and more effective communication.
- Change Tracking: With the ability to view version history and track changes made to the design, teams can stay on top of the project's evolution and revert changes if necessary.
- Universal Access: Being a web-based application, Figma allows team members to access and work on designs from anywhere and at any time, as long as they have internet access.
Collaboration Features in Figma
Figma offers a variety of features designed specifically to facilitate collaborative work on design projects. Some of these features include:
- Real-Time Comments: Users can add comments directly on the design, enabling instant and specific communication about specific elements of the design.
- Real-Time Sharing and Collaboration: Figma allows multiple users to work on a design simultaneously, meaning changes are reflected instantly for all team members.
- Version Control: Figma maintains a detailed history of previous versions of the design, allowing users to revert to previous versions if necessary and compare changes between versions.
- Permission Management: File owners can control who has editing and viewing access to designs, ensuring the security and privacy of project data.
Best Practices for Collaborative Work
To make the most of Figma's collaboration features, it's important to follow some best practices:
- Clear Communication: Establishing clear and direct communication channels within the team ensures that everyone is aware of changes and comments on the design.
- Labeling and Organization: Using labels and a consistent organizational structure in Figma files makes searching and navigating easier for all team members.
- Regular Review: Scheduling regular design reviews to gather feedback and make adjustments as needed helps keep the project on track and ensures everyone is aligned with design goals.
- Training and Education: Providing training and education on Figma's collaboration features ensures that all team members are familiar with the platform and can use it effectively.
Collaborative work in Figma is a powerful tool that can significantly improve the efficiency and quality of the design process. By leveraging Figma's collaboration features and following best practices for teamwork, teams can work more effectively together, resulting in stronger designs and higher-quality final products.
Optimizing Workflows with Components and Styles
In user interface design, optimizing workflows is essential to increase efficiency and consistency in the design process. In this chapter, we will explore how to use components and styles in Figma to optimize your workflows and improve the quality of your designs.
What are Components in Figma?
Components are reusable elements that can contain one or multiple objects, such as shapes, text, images, or even other components. By creating a component in Figma, you can reuse it in multiple places within your design and update it centrally, ensuring consistency and facilitating the maintainability of your designs.
Benefits of Using Components
- Consistency: By using components, you can ensure that similar elements in your design have the same appearance and behavior, ensuring a consistent user experience.
- Efficiency: Reusing components saves you time by not having to recreate the same elements over and over again. Additionally, any changes made to a component will automatically be reflected in all instances of it in your design.
- Scalability: Components make it easy to scale your designs, as you can easily add new elements based on existing components without compromising visual coherence.
How to Use Components in Figma
- Creating Components: To create a component in Figma, select the objects you want to include in the component and click "Create component" in the toolbar or press Cmd/Ctrl + Alt + K.
- Editing Components: To edit a component, simply double-click on it to enter edit mode. Any changes you make will apply to all instances of the component in your design.
- Reusing Components: Drag a component from the component panel and place it on your canvas to reuse it in your design. You can adjust the size and position as needed.
What are Styles in Figma?
Styles in Figma are sets of design properties, such as color, typography, and effects, that can be applied consistently throughout your design. Styles allow you to maintain visual consistency and make it easy to update multiple design elements centrally.
Benefits of Using Styles
- Visual Consistency: By defining and using styles, you can ensure that design elements in your project have a consistent appearance at all times.
- Ease of Update: If you need to make changes to your styles, you only need to update the style in one place, and all associated design elements will be automatically updated.
- Design Agility: Styles save you time by not having to manually adjust each design element. Simply apply a predefined style and you're done.
How to Use Styles in Figma
- Creating Styles: To create a new style, select an object with the desired design properties and click "Create style" in the style panel.
- Applying Styles: To apply a style to an object, select the object and click on the desired style in the style panel. You can also drag and drop a style directly onto the object.
- Updating Styles: If you need to make changes to an existing style, simply make the changes to the master style, and all instances of the style will be automatically updated.
Optimizing Workflows with Components and Styles
By combining the use of components and styles in Figma, you can significantly optimize your design workflows. Some best practices to maximize efficiency include:
- Establish Design Libraries: Create reusable component and style libraries that can be shared across projects and teams.
- Regular Maintenance: Regularly maintain your design libraries to remove obsolete components and styles and ensure consistency across all your designs.
- Clear Documentation: Document your components and styles so that other team members can understand how and when to use them correctly.
Effective use of components and styles in Figma can dramatically improve the efficiency and quality of your design workflows. By adopting these best practices and making the most of Figma's tools, you can create more consistent, scalable, and easy-to-maintain designs.
Creation and Management of Interactive Prototypes
Creation and management of interactive prototypes are fundamental parts of the user interface (UI) and user experience (UX) design process. In this chapter, we will explore key concepts, best practices, and tools available for creating and managing interactive prototypes in Figma.
What is an Interactive Prototype?
An interactive prototype is a functional representation of a user interface design that simulates user interaction with the application or website. Unlike static mockups, interactive prototypes allow designers and development teams to test navigation, transitions, and workflow of the application before its implementation.
Benefits of Interactive Prototypes
- Concept Validation: Interactive prototypes allow designers to validate concepts and gather early feedback from users before starting full product development.
- Issue Identification: By simulating the user experience, interactive prototypes help identify and correct usability and design issues before the final product is in the hands of users.
- Team Alignment: Creating interactive prototypes facilitates communication and alignment among designers, developers, and stakeholders by providing a tangible representation of the expected design and functionality.
Tools for Creating Interactive Prototypes in Figma
Figma offers various tools and features that facilitate the creation of interactive prototypes. Some of these tools include:
- Link Prototyping: Figma allows linking frames and design elements to simulate user navigation and interaction. Links can be configured to trigger page transitions, state changes, and specific actions on click, hover, or scroll.
- Transitions and Animations: With Figma, designers can add transitions and animations to design elements to create more dynamic and realistic interactive prototypes. Transition options include fades, slides, scales, and rotations, among others.
- Component States: Components in Figma can have different states, such as active, inactive, or hovered. When creating prototypes, designers can show how components change in response to user interaction, allowing for a better understanding of the application flow.
Best Practices for Creating and Managing Interactive Prototypes
- Clarity and Consistency: Maintaining clarity and consistency in user interaction is important to ensure a coherent experience throughout the prototype.
- Iterative Testing: Conduct iterative testing of the prototype with real users to identify areas for improvement and make adjustments as needed.
- Detailed Documentation: Document the behavior and functionality of the prototype so that other team members can understand its purpose and use it effectively.
- Collaboration and Sharing: Facilitate collaboration and sharing of the prototype with other team members and stakeholders to gather feedback and make adjustments.
The creation and management of interactive prototypes in Figma are essential for effective development of digital products. By using the tools and features available in Figma and following best design practices, teams can create interactive prototypes that validate concepts, identify issues, and provide an exceptional user experience.
Useful Integrations and Plugins in Figma
In the world of user interface and user experience design, efficiency is key. Fortunately, Figma offers a wide range of integrations and plugins that can help designers optimize their workflow and expand the capabilities of the platform. In this chapter, we will explore some of the most useful integrations and plugins in Figma and how they can benefit designers in their daily work.
Benefits of Integrations and Plugins in Figma
Integrations and plugins in Figma offer a series of benefits that can significantly improve productivity and the quality of design work. Some of these benefits include:
- Automation of Repetitive Tasks: Plugins can help automate repetitive tasks, such as generating test data, exporting assets, and creating mockups, allowing designers to focus on more creative aspects of design.
- Expansion of Functionality: Integrations and plugins can expand the functionalities of Figma, adding new tools and features that are not available natively on the platform.
- Customization of Workflow: Designers can customize their workflow using integrations and plugins that suit their specific needs, allowing them to work more efficiently and effectively.
Useful Integrations in Figma
Figma offers a variety of integrations with other tools and platforms that can improve the workflow of designers. Some of the most useful integrations include:
- Zeplin: Zeplin is a collaboration tool for designers and developers that allows for quick and easy sharing of Figma designs, generating design specifications, and facilitating collaboration between teams.
- Slack: Figma's integration with Slack allows teams to share designs and receive feedback directly on the messaging platform, facilitating communication and collaboration on design projects.
- Jira: Teams using Jira for project management can integrate Figma to link designs with specific tasks and issues, helping to maintain traceability and alignment between design and development.
Useful Plugins in Figma
In addition to integrations, Figma also offers a wide library of plugins developed by the community that can improve the workflow of designers. Some of the most useful plugins include:
- Google Sheets Sync: This plugin allows syncing data from Google Sheets spreadsheets with design objects in Figma, facilitating the creation of data-driven designs and automatic updating of information in designs.
- Content Reel: Content Reel is a plugin that allows designers to search for and add stock images, icons, and other design elements directly from Figma, saving time and facilitating the incorporation of visual content into designs.
- User Flows: User Flows is a plugin that helps create user flow diagrams and sitemaps directly in Figma, facilitating the visualization and communication of navigation flow in a design.
Integrations and plugins in Figma are powerful tools that can significantly improve productivity and the quality of design work. By leveraging these tools, designers can automate repetitive tasks, expand the functionality of the platform, and customize their workflow to suit their specific needs. With a wide range of integrations and plugins available, Figma continues to be a leading choice for designers worldwide.
Tips for Maintaining an Efficient Design Practice
In the competitive world of design, maintaining an efficient practice is essential to excel and consistently produce high-quality results. Designers constantly face challenges ranging from tight deadlines to the need to stay creative and updated with the latest trends. In this chapter, we will explore a series of tips for maintaining an efficient design practice that will allow you to tackle these challenges with confidence and achieve your design goals effectively.
Set Clear Goals and Priorities
One of the first steps to maintaining an efficient design practice is to set clear goals and priorities. Before starting any project, take the necessary time to define what you want to achieve and which aspects are most important. This will help you focus your energy and time on tasks that truly matter and avoid getting caught up in unnecessary details.
Maintain Open Communication
Effective communication is fundamental in any design practice. Keep lines of communication open with your team, clients, and stakeholders to ensure everyone is aligned regarding goals, expectations, and project requirements. Regular and constructive feedback can also help improve your designs and avoid misunderstandings later in the process.
Use Appropriate Tools and Resources
Having the right tools and resources can make a big difference in the efficiency of your design practice. Make the most of design tools like Figma, Adobe XD, or Sketch, as well as resources such as design libraries, UI kits, and plugins that can help speed up your workflow and improve the quality of your designs.
Organize and Document Your Work
Organization and documentation are key to maintaining an efficient and effective design practice. Keep your project files and folders well-organized and labeled so you can easily find what you need when you need it. Additionally, document your design process, decisions, and thoughts to have a useful reference in the future and facilitate collaboration with other team members.
Practice Time Management
Time management is crucial to staying on track and meeting project deadlines. Dedicate time to plan your day, set priorities, and allocate time to specific tasks. Use time management techniques like the Pomodoro technique or the Eisenhower matrix to maximize your productivity and minimize distractions.
Seek Inspiration and Continuous Learning
Design is a constantly evolving field, so it's important to stay inspired and continuously learn. Dedicate time to explore the work of other designers, follow design blogs and websites, attend conferences and workshops, and participate in online communities. Continuous inspiration and learning will help keep your creativity fresh and keep you informed about the latest design trends and techniques.
Maintaining an efficient design practice requires discipline, focus, and dedication. By setting clear goals, maintaining open communication, using the right tools and resources, organizing and documenting your work, practicing time management, and seeking inspiration and continuous learning, you'll be on the right path to success in your design projects. Remember that practice makes perfect, so keep working hard and never stop learning and growing as a designer.
Conclusions and Recommendations
In this final chapter, we will summarize the main points discussed throughout this book and provide some final recommendations for those looking to improve their design skills and optimize their work in Figma. Additionally, we will highlight the importance of design in today's world and how Figma has revolutionized the way designers create and collaborate on design projects.
Importance of Design in Today's World
Design plays a crucial role in the success of any product or service in today's world. From mobile applications and websites to physical products and digital services, design influences user experience, usability, and brand perception. Companies that prioritize design tend to stand out in an increasingly competitive market and build stronger relationships with their customers.
The Impact of Figma on the Design World
Figma has revolutionized the way designers work and collaborate on design projects. By offering a cloud-based platform with real-time collaboration features, Figma has eliminated traditional barriers that existed between designers and has allowed design teams to work more efficiently and effectively, regardless of their geographical location.
Final Recommendations for Designers
For those looking to improve their design skills and optimize their work in Figma, here are some final recommendations:
- Practice Constantly: Design is a skill that improves with practice. Dedicate time regularly to practice and experiment with new design techniques and tools.
- Stay Updated: The design world is constantly evolving, with new trends and emerging technologies. Stay up to date with the latest news and design trends to keep your skills updated.
- Seek Feedback: Don't be afraid to ask for feedback on your work. Seek opinions from your colleagues, mentors, and design communities to gain different perspectives and continuously improve.
- Learn from Others: Observe and study the work of other talented designers. Analyze how they approach design problems and what techniques they use to find inspiration and learn new ways to tackle design challenges.
- Experiment with Figma: Figma offers a wide range of features and tools. Take the time to experiment with all the features that the platform offers and discover how they can improve your workflow and designs.
Final Conclusions
In summary, design is a fundamental discipline in today's world, and Figma has proven to be an invaluable tool for designers worldwide. From its focus on real-time collaboration to its wide range of features and tools, Figma has facilitated the design process and allowed design teams to work more effectively and efficiently.
For those looking to improve their design skills and optimize their work in Figma, it is important to stay focused on constant practice, stay updated with the latest trends and technologies, seek feedback from colleagues and mentors, learn from other talented designers, and experiment with all the features that Figma offers. By following these recommendations and maintaining a dedicated focus on design, designers can achieve new levels of success and excellence in their work.